Atlases
Description
Atlases are a way of combining many textures into a single large texture to reduce texture sampler usage in the gpu shader pipeline which improves rendering performance in game engines like Unity, Unreal Engine, Godot, etc.
Although Decal Atlases are indistinguishable from Trim Sheets in terms of data, DecalMaster functionally separates them.
Atlases only pack decals and flows employed in the Maya scene into a single texture while ignoring any trims.
Atlases are exclusively utilized during the export stage, where they are assigned to the decals and flows, before selecting the desired atlas texture maps to channel pack into image files for export.
 For Your Consideration
You could, for any reason, use an atlases texture maps as inputs when creating a trim sheet, converting the decals and flows into trims in a trim library.
Atlas Editor
The Atlas Editor is used to create atlases from the decals and flows employed in the Maya scene. There are a number of different options that determine how decals and flows are packed into an atlas. These options are provided to enable greater flexibility and optimized shader pipelines in game engines.
To access the tool, go to DecalMaster > Create > Atlas Editor located on the Maya menu bar.
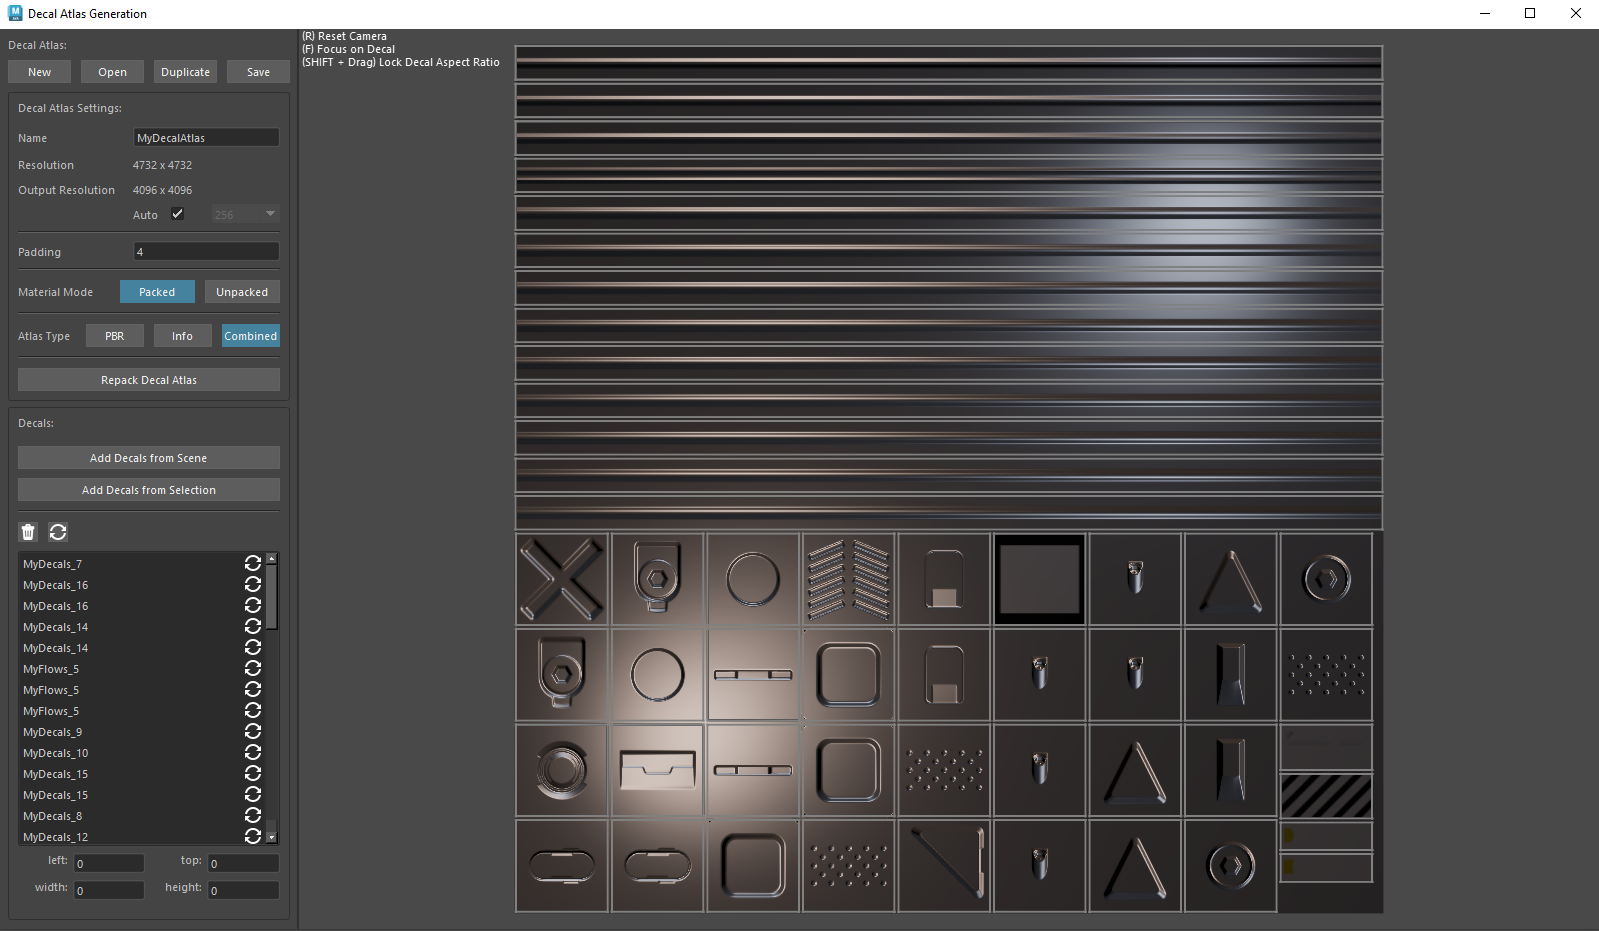
Atlas Resolution and Padding
-
Resolution
Denotes the internal resolution of the atlas.
-
Output Resolution
Denotes the actual resolution of the atlas texture maps when saved to file.
-
Padding
Texel padding between decals is required to avoid texel bleeding when texture filtering is employed in texture sampler stage.
Material Packing Mode
PBR Decals in Maya are each given their own StandardSurface material, allowing them to individually match to the target mesh.
When combining decals into an atlas by necessity all decals are assigned a global material that samples from the atlas texture maps.
As continuing to assign a unique material to each decal would defeat the purpose of combining the decal textures into a single atlas texture.
This creates a problem when exporting PBR decals that are used multiple times on a target mesh if those decals match to different target mesh materials.
There are two ways to solve this.
The first is to insert only unique decals into the atlas, then create a game engine material that masks per material property, this way we can mask out the affect of color, roughness and metalness the decal would have while rendering
only the normal map surface detail so the underlying target mesh material color, roughness and metallic, are still displayed where the decal is masked out.
This is the more flexible solution as it allows you to alter the underlying target mesh material without needing to rebake the decal atlas, however, it requires more complex material shaders that you may have to create if the engine does not provide the functionality.
The second way to solve this is to insert duplicate decals for each packed material-decal pair into the atlas, exporting the decals material color, roughness and metallic properties alongside the other texture maps.
This method has the benefits of only requiring standard materials and so is simple to setup and has slightly improved performance due to reduced shader complexity, with the trade off of requiring an atlas rebake if you change the underlying target mesh materials.
-
Packed Mode
Inserts each unique packed material-decal pair into the atlas enabling the use of standard game engine materials with simple alpha masking to be used. May, but not necessarily, increase atlas texture size. See above for details.
-
Unpacked Mode
Inserts only unique decals into the atlas, this method reduces atlas size but requires game engine materials support per material property masking. See above for details.
Atlas Type
Atlases can contain PBR decals, info decals or both. The reason behind this is that game engine materials used to render PBR decals can be expensive to compute and it is a waste of processing power to use them only to render color information,
so to increase rendering performance one could separate the info decals into their own atlas and therefore the material used could be much more efficient.
With this in mind you're given the option to create combined or separate decal atlases.
-
PBR
PBR decals and flows only.
-
Info
Info decals only.
-
Combined
All decals and flows. See above for details.
Adding Decals
-
Add Decals from Scene
Adds all decals currently being displayed in the scene to the atlas.
-
Add Decals from Selection
Adds only selected decals in the scene to the atlas.
Decals Tools
 Completely removes a decal from the atlas.
 Reset the decals dimensions to its original file size.
Decals can be scaled by either mouse dragging the sides of the rect or through the decal coordinates inputs. Coordinates inputs can be used to precisely scale a decal if pixel perfect dimensions are required.
After you've made changes to any decals you have the option to repack the decals into the atlas.
 Important
Keep in mind, repack will reposition every every decal in the atlas.